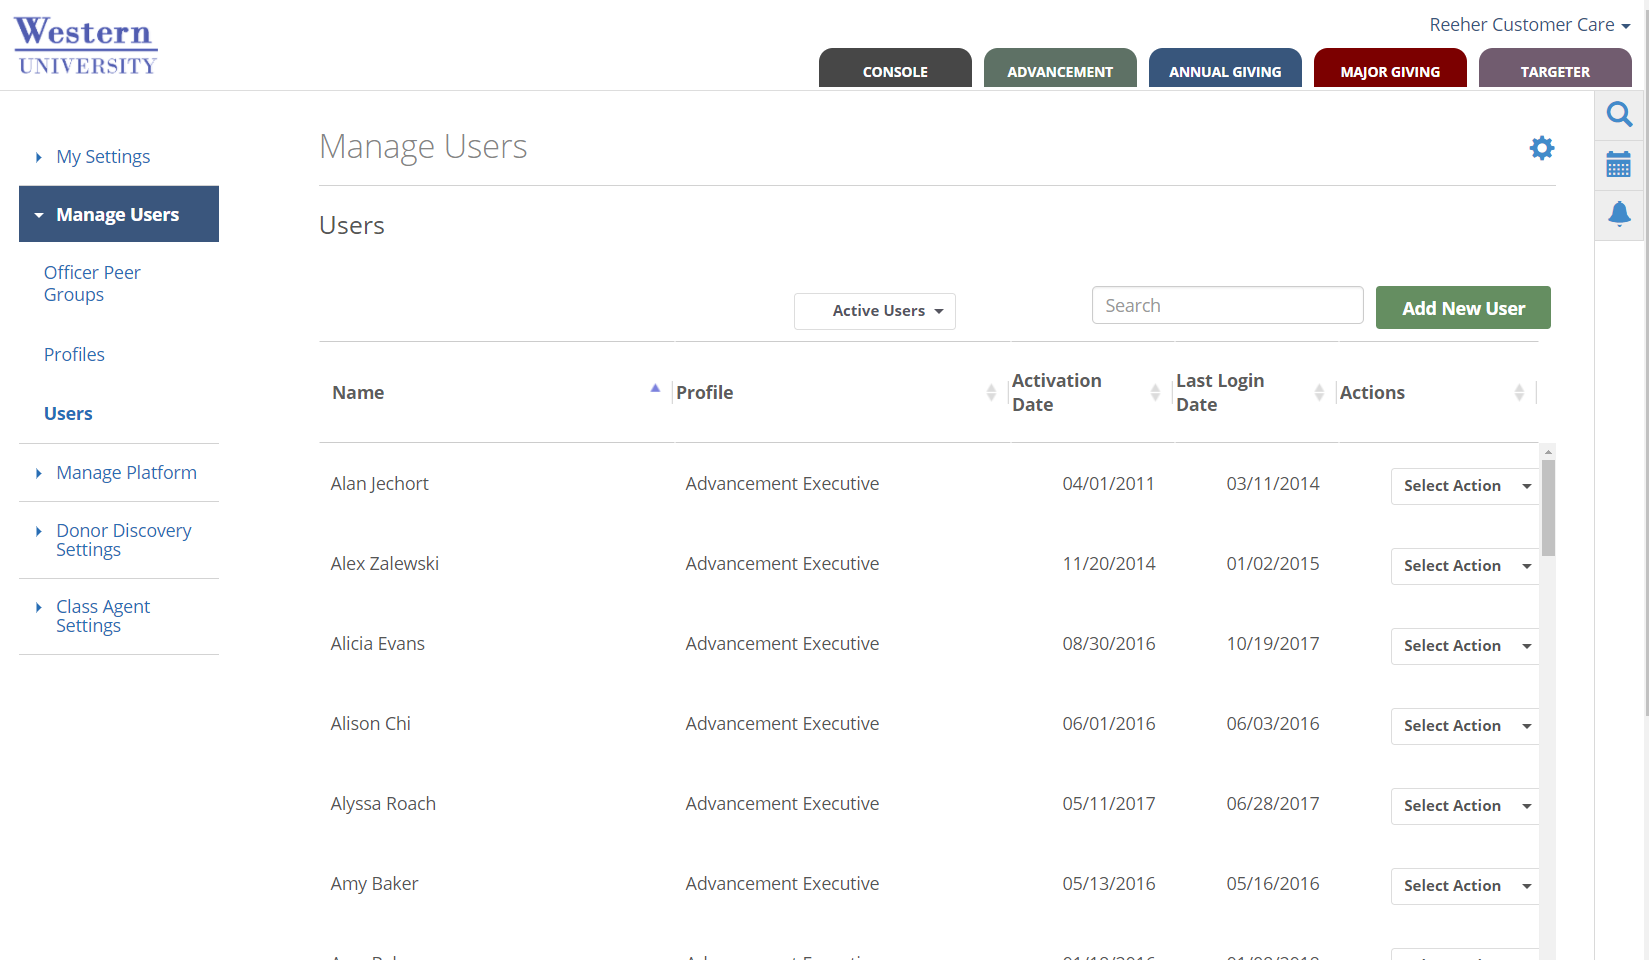
The Users tool allows you to manage individuals access to the Reeher Platform. From this to tool, you can create new users, edit information on existing users, deactivate users, and reset passwords. Users can be managed by individuals with access to the Manage User tools within Control Panel.
Creating and editing a User
To create a new user, click on the Add New User button located at the top of the table on the Users tool’s page. If you wish to edit an existing user, you can select Edit within the Select Action drop down next to the user’s account. This will open the User dialogue box.
User Dialog Box
The User Dialog Box is organized into three sections:
- The first section contains the general user information.
- The next section, User Profile Permissions, displays all of the Layer and Tab access this user has access to (based on the User Profile that has been selected).
- The Set Additional User Permissions section allows you to specify additional access and rights at the user level. When creating a new user you will not see the User Profile Permissions or Set Additional User Permissions sections until you have selected a User Profile for the record.

The following list provides an overview of the definition of each field and how it is used within the general information section of the User dialogue box.
- First Name - This is a required field.
- Last Name - This is a required field.
- User Status - This defines whether or not the user will have access to the Reeher Platform. Active users will be able to access the Reeher Platform and Inactive Users will not be able to log into the Reeher Platform. This is a required field.
- Email - This email address will be used as the default user name for the user's log-in credentials. A valid email address must be entered in order to access the Reeher Platform. This email address will be what Reeher uses to communicate to users about password resets, training opportunities, system maintenance, new features, etc. This is a required field.
- Username - This field contains the username that a user will use when logging into the Reeher Platform. By default, the username field is automatically populated with the email address that is entered. However, the System Administrator can change an individual's username. This is a required field.
- User Profiles - The Profile selected will provide the user with the default access to the Layers and Tabs within the Reeher Platform. Once a Profile is selected you will see the User Profile Permissions section appear in the dialogue box that summarizes the user access. This is a required field.
- Title - This field defines the user’s job title and is an optional field.
- Department - This field defines the user’s department and is an optional field.
- Officer ID - This field is required if you are setting up a user that is a gift officer, but otherwise is not required for any other type of user. This drop down allows you to connect the user in the Reeher Platform to the gift officer’s data (i.e. contacts, proposals, assignments, etc.) that are being provided from your institution’s system to the Reeher Platform.
- Officer Peer Group - This field allows you to define the Peer Group that a gift officer should be associated with. It is a requirement if you want to benefit from the officer benchmark reporting the Major Giving layer. Each officer can only be assigned to one Peer Group.
- User Groups - This field allows you to associate the user with one or more User Group. This field is optional.
You can also limit which officers a user has access to view performance information within the Major Giving Layer by using the drop-down that reads "Select additional officers this user can view". This drop down allows you to specify which particular officers or groups of officers each user can see with the Major Giving Layer. The officers are organized by Peer Group.
- If you select “Check all”, the user will have access to all officers that are currently in the Platform or will exist in the future.
- If you select on the name of the Peer Group(s) within the drop down, it will select all of the officers in the Peer Group.
By clicking on the Peer Group name it will allow the user to see all officers in the Peer Group(s) that exist now or as they are added to the Peer Group(s) in the future. Finally, you can also select individual officers. However, as new officers are added you will then need to update each user’s account to add the individual officers to their list. It is recommended that you allow users to see all officers or all within selected Peer Group(s) to minimize the administration.
If your institution has subscribed to the Reeher Platform’s best practice module called Activity Center, you can provide users with the ability to edit any contact or task record that was created within the Reeher Platform. Click on the check box that is titled Allow user to edit activity information and then click on Submit to provide a user with this permission.
Frequently Asked Questions
- How do I Reset a User's Password?
- How do I deactivate a user?
- How do I limit which officers can be viewed by another user within the Major Giving Layer?
- How do I give someone appeal editing rights in the Appeals Tab of the Annual Giving Layer?
- How do I change a Profiles default Viewports?
- How do I remove access to a Viewport from a Profile or User?
How do I Reset a User’s Password?
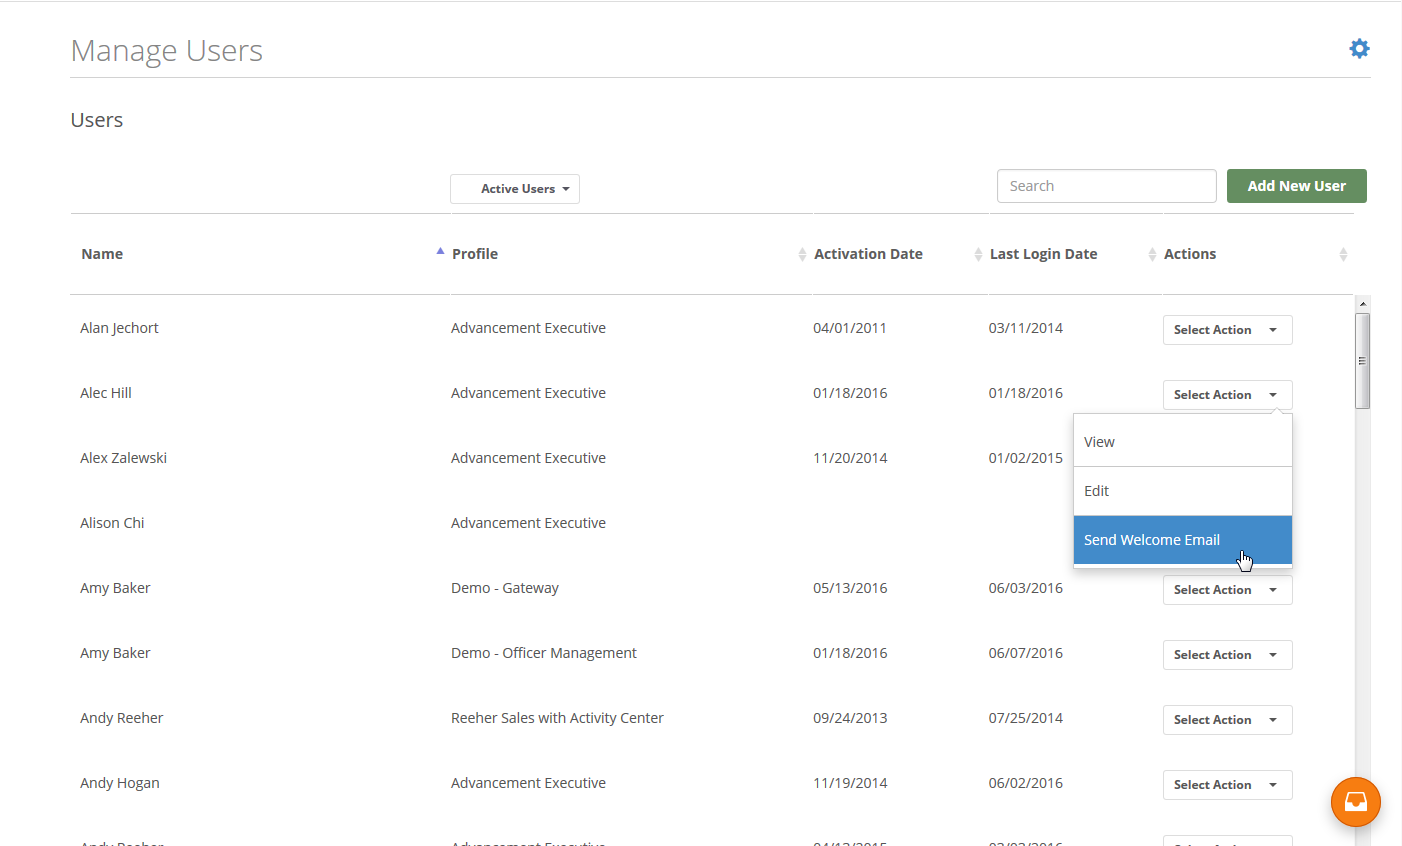
In order to send a user a password reset email you will need to go to the Users tool under the Manage Users Tab within Control Panel. Once there, select Send Welcome Email from the Select Action drop down next to the user’s name. This will automatically send an email from the Platform to that user which will allow the user to change their password to access the Reeher Platform.
How do I deactivate a user?
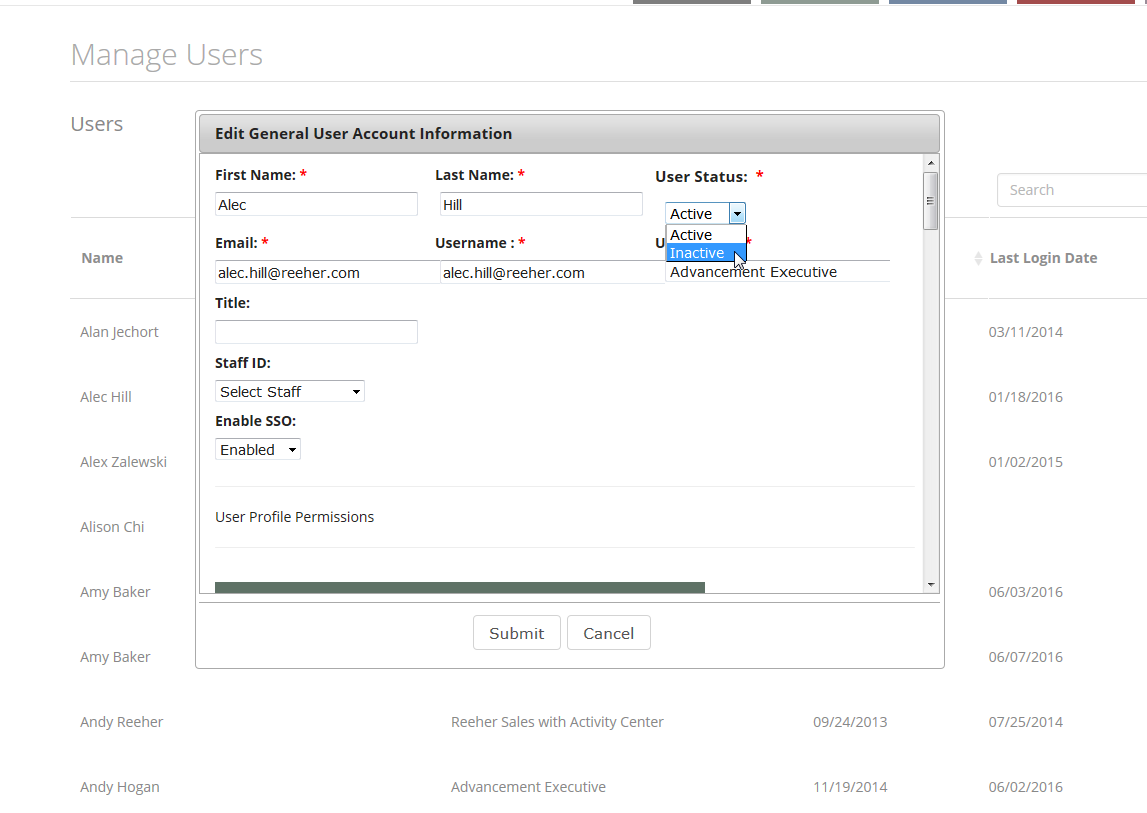
You can terminate a user’s access to the Reeher Platform by navigating to Control Panel, then selecting Manage Users. From there, select Users to open the tools. Choose Edit from the Select Action drop down next to the existing user’s record. This will open the User dialogue box. Change the User Status from Active to Inactive. Then click on the Submit button at the bottom of the dialogue box. The user will then no longer be able to access the Reeher Platform.
How do I limit which officers can be viewed by another user within the Major Giving Layer?
You can limit the officers that a user can view within the Major Giving Layer by using the Users tools under the Manage Users Tab within the Control Panel Layer. Select Edit from the Select Action drop down next to the existing user’s record. This will open the User dialogue box. Go to the Select Additional User Permissions section and click on the drop-down that reads "Select additional officers this user can view". This drop down allows you to specify which specific officers or groups of officers each user can see with the Major Giving Layer. The officers are organized by Peer Group. If you select “Check all” the user will have access to all officers that are currently in the Platform or will exist in the future. If you select the name of the Peer Group(s) within the drop down it will select all of the officers in the Peer Group. By clicking on the Peer Group name it will allow the user to see all officers in the Peer Group(s) that exist now or as they are added to the Peer Group(s) in the future. Finally, you can also select individual officers. However, as new officers are added you will then need to update each user’s account to add the individual officers to their list. It is recommended that you allow users to see all officers or all within selected Peer Group(s) to minimize the administration.
How do I give someone appeal editing rights in the Appeals Tab of the Annual Giving Layer?
Each night we receive a file from your institution with a variety of appeal information. This includes Appeal Code, Appeal Description, Appeal Type, Fiscal Year Initiated, Number Solicited, and Appeal Cost. The data provided from your institution in the nightly file is the final source of record. If you do not track certain fields in your database, the Appeals Tab has been designed so that you can enter additional fields like cost and number solicited for the benefit of reporting. However, data you add in the Platform for Appeals does not flow back into your system. Since your institution's data is the final source of record we encourage you to track it in your system and provide it in the nightly file we receive with appeal information.
The Edit Appeal feature allows you edit appeal information from within the Platform. It will allow you to assign or re-classify appeal type, record the number solicited, enter the drop date and cost information, and select the fiscal year initiated. To edit an appeal's information, click on the Appeal Code within the Appeal Table to display the Edit Appeal dialog box.
All users do not have access to edit the appeal information within the Edit Appeal dialogue box. Providing appeal editing permission can be done by using the Users tools under the Manage Users Tab within the Control Panel. Select Edit from the Select Actions drop-down next to the user’s name. This will open up the User form. Within the Set User-Specific Permissions of the User Account dialogue box there are two additional permissions that are set at the User level that cannot be defined at the Profile level. Check the box under the Appeals Tab section within the Set User-Specific Permissions section that says “Allow user to edit appeal information”. This will allow the user to edit the appeal information within the Appeals Tab.
How do I change a Profile's default Viewports?
Within the Profiles tool (found in Control Panel within the Manage Users Tab) click on the Select Action drop down next to the Profile you wish to edit and select Edit Viewports. This will open the Edit Profile Viewports dialogue box that allows you to select which Viewports are Accessible for each Profile and which Viewports should be the Profile’s default Viewports when they first view the reporting Tab within the Annual Giving or Major Giving Layers.
Within the Edit Profile dialogue box you will only see the reporting Tabs that the Profile has access to. Click on the name of the Tab to expand the table and see the Viewport names that are available for each Tab. By default all Viewports are accessible for all users within the Profile and the Platform has pre-selected defaults for each reporting Tab.
With the Viewport table expanded you can click the check box under the Is Default column to define which Viewports should appear by default for each user in the Profile. Six Viewports for each reporting Tab must be selected. Each user has the ability to change which six Viewports they see within the report Tab for themselves by swapping out the defaults you’ve selected with one of the other Viewports you made accessible to the Profile.
Once a user has saved his or her Viewport preference, changing the default will no longer affect those users. Saving a preference means that the user has saved their own configuration of Viewports that are Accessible to them. Changing the default Viewports will only change those users who are using the existing default Viewports.
Click on the Submit button to save all the Viewport changes you’ve made to the Profile.
How do I remove access to a Viewport from a Profile or User?
Within the Profiles tool (found in Control Panel within the Manage Users Tab) click on the Select Action drop down next to the Profile you wish to edit and select Edit Viewports. This will open the Edit Profile Viewports dialogue box that allows you to select which Viewports are Accessible for each Profile and which Viewports should be the Profile’s default Viewports when they first view the reporting Tab within the Annual Giving or Major Giving Layers.
Within the Edit Profile dialogue box you will only see the reporting Tabs that the Profile has access to. Click on the name of the Tab to expand the table and see the Viewport names that are available for each Tab. By default all Viewports are accessible for all users within the Profile and the Platform has pre-selected defaults for each reporting Tab.
With the Viewport table expanded you can un-check the box under the Is Accessible column to remove the Viewports access for all users within the Profile.
Click on the Submit button to save all the Viewport changes you’ve made to the Profile.